 |
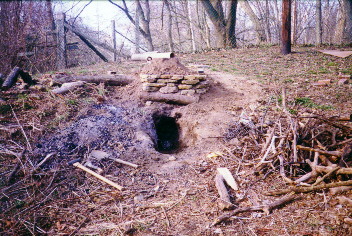
Here is a front view of the kiln, just before I lit the thing. |
Experimental
Wood-Fired Earthen Kiln Adventure
Of Course, I'll start with pictures
|
Here is a front view of the kiln, just before I lit the thing. |
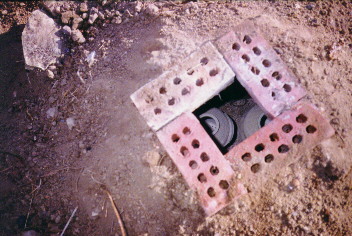 |
You can see the two greenware pots that I was able to fit into the small firing chamber. |
 |
I lit a small fire inside the fire box and burned twigs and weeds for about forty-five minutes before I started to crank it up. |
 |
I have started to add larger branches and small logs. Using the chimney helps all the gases to burn and there is very little smoke coming out the top. |
 |
The temperature inside is about 1000 degrees by now. |
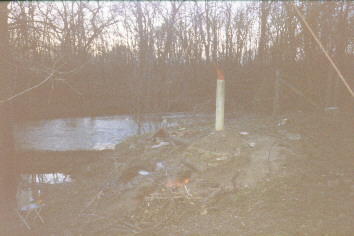 |
A nice view of the kiln on the hill by the creek as the sun goes down. |
 |
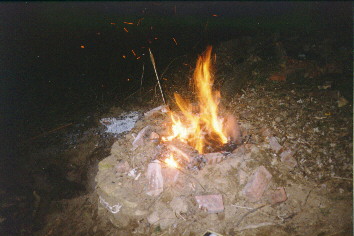
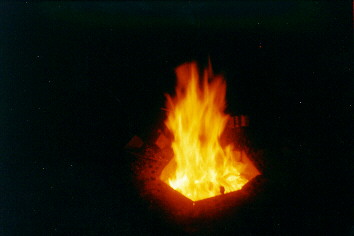
The inside temp. is now at about 1500. I have just stoked the firebox and you can see the foot long flame coming out the top. This is the fun part. |
 |
Here, I have taken the chimney off after it has cooled a little and I've thrown a bunch of dry weeds and leaves inside the firing chamber. |
 |
This is the same scene without a flash. I did
get enough leaves inside to burn and smolder against the
pots. I removed the pots sooner than I should have
because the chamber was still so hot that I was afraid
much of the color would burn off. Sorry I forgot to include the pots from this firing; I'll get them in sometime later. |
Here is a brief report on a simple, primitive kiln I made in the side of the hill by my studio. I'm not the best documenter in the world but here goes. I dug out the remains of an old varmint hole and converted it into a firebox and dug a hold on top of the hill to create a firing chamber. I finished off the top with a few stray fire bricks and a bunch of red clay bricks. Two fire-bricks were used for the floor of the kiln, so that there would be something to balance kiln furniture on. The dirt at the top of the kiln walls were leveled off so that red clay brick could be placed in a circular fashion creating the top of the kiln. Enough space was left open on the top to place a four foot section of heating duct for a chimney. Two bricks, one on either side, were used for a damper. After the roof of the kiln was constructed, I placed loose dirt all around the roof of the kiln all the way to the chimney for added insulation. Since the kiln is experimental, a piece of flagstone was used for a kiln shelf. The fire chamber was small and I didn't have any broken shelves to use. The following are some brief notes on the first firing:
Since I still had another day of the weekend available, I made a few modifications to the kiln and decided to crank it up again. I enlarged the firing chamber to accommodate one of my half circle shelves, this made the firing chamber only big enough for about 2 or 3 average sized pots at most. I did not have a fire grate so I made one out of a couple of pieces of metal from some shelving to hold the wood so I could more easily scoop out the coals and ash. I was using a pyrometer to measure temperature so it may have been hotter, since pyrometers are not always acurate. I was not able to create a peep hole, to view cones, in the side of the hill. Here are some brief notes on the second firing:
| Time | Temp | Documentation |
| 4:30 | Air-temp Started a small fire with a few dry weeds and sticks to preheat chamber. | |
| 5:10 | 0350 | Started to add larger sticks. |
| 5:30 | 0500 | Added a few larger logs of about 2" in dia. to build up coals. |
| 5:45 | 0600 | Small bed of coals starting. |
| 5:55 | 0750 | |
| 6:00 | 0875 | |
| 6:50 | 1000 | The stone chips are popping, which are resting on top of the bricks next to the chimney, that are holding back the dirt. |
| 6:20 | 1200 | |
| 6:30 | 1200 | Added a few pieces of old, partially decayed chopped oak and more small sticks. |
| 06:45 | 1375 | |
| 6:47 | 1450 | Stoked fire and scooped coals out to help air flow and through them on top of the fire. |
| 7:11 | 1500 | The sun is down and there is a flame over a foot long coming out the top of the chimney. |
| 07:20 | 1600 | |
| 7:29 | 1450 | Cleaned out coals and stoked fire, it jumped back to 1500. |
| 8:00 | 1500 | Cleaned out coals and stoked fire. |
| 8:45 | 1500 | Stopped feeding fire and let it burn down. |
| 9:30 | 1000 | Removed chimney and opened top of kiln to allow heat to escape. |
| 9:45 | 0800 | Filled chamber with dry leaves and weeds until there was enough material smoldering around pots. |
| 10:00 | 0800 | Using gloves and the pots still slightly red on the inside, I pulled the pots out of the firing chamber so that the smoke marks do not burn away. No cracks . |
All and all, it was a learning expereince and it was fun. I'm sure I will be doing more experimenting with this thing. If you have any questions or suggestions, feel free to e-mail or give me a call at 651-337-0400 and I’ll be happy to assist you in any way that I can.
[Home] | [About] | [Mudslinger Pottery]